
9 Steps To Create A Functional Print-On-Demand Website
Have you decided on a print-on-demand business idea, but you don’t know how to create a webshop on your own? Don’t worry, as we have created a guide that shows 9 simple steps to create a functional print-on-demand website powered by WordPress and Printful.
In summary, these are the 9 steps:
- Register on Printful
- Create products on Printful
- Add a billing method to Printful
- Register your domain and hosting
- Set up your WordPress site
- Set up your WooCommerce store
- Connect Printful with your store
- Add products to your store
- Customize your WordPress theme
Without further ado, let’s begin our guide!
Step 1: Register On Printful
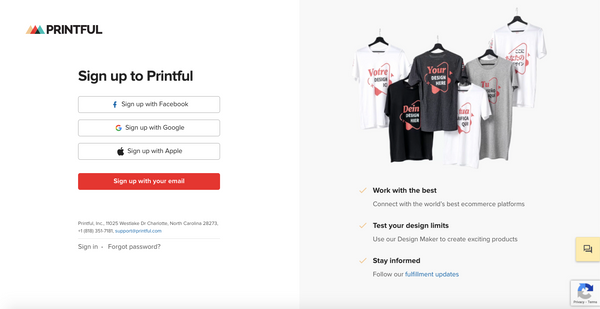
Before you create a functional print-on-demand website, you need to set up your Printful account. First of all, go to the Printful home page. Click on the Start selling button, which will get you to a registration form.
Choose your registration method, enter the necessary data, and register to Printful. Once you complete the registration form, you will get a question asking what you would like to do with Printful.
After that, all you need to do is confirm your email by checking a mail sent by Printful and clicking the Confirm button.
Step 2: Create Products On Printful
You’ll now have access to your personal Printful panel. On the right side, you can see a menu. Now, you want to create your first product. Go to the Product templates tab and click on Create new template.
You’ll get to the screen with various product categories. For this example, let’s create a tote bag.
Once you choose the product type, a screen will pop up. On this screen, you can select the printing technique, product color and add your design to the product. You can add your own design, choose from Printful’s design templates, or start from scratch.
Of course, you can change various attributes of your design. When satisfied, continue to review the design. In the Review tab, you can give the title to your design, add product sizes, and finally - save the product template.
If you want to create more products, follow this step as much as you like.

Step 3: Add A Billing Method To Printful
Next, you are going to add a billing method to your Printful account. You need it because Printful will charge you for their printing and shipping services. On the other hand, your customers will pay you via your WordPress online store.
Go to Billing > Billing Methods and click on Add a billing method button. You will then need to fill in some billing info and add your credit card or PayPal for payments. Don’t worry; you won’t be charged anything before you order an item via Printful!

Step 4: Register Your Domain And Hosting
The most flexible platform you can choose to create a functional print-on-demand website is WordPress + WooCommerce plugin.
To get this system up and running swiftly, we recommend this awesome Bluehost deal. This combination provides you with a domain, hosting, WordPress site, essential plugins (like Customer Reviews, for example), and WooCommerce (that’s going to power your online store). The standard plan will cost you $16/month!
Once you choose the plan, type in your domain, enter your account details and complete the purchase. Bluehost will send you login details for the web hosting control panel (cPanel). Once you log in, click log in to your site, and you will get transferred to the WordPress dashboard, where you can customize and control your new print-on-demand website.
Step 5: Set Up Your WordPress Site
As you are on the WordPress Dashboard panel, you can see a menu on the left-hand side. Go to Settings > General and type in your Site Title and Tagline.
Bluehost also added an SSL Certificate with their plan, which will load your page as HTTPS. This is considered a security practice, and you want your customers to trust you.
You want to set up SSL, which is quite simple. Go to Settings > General and put HTTPS instead of HTTP in WordPress Address and Site Address fields.
Don’t forget to save the changes!

Step 6: Set Up Your WooCommerce Store
Before you connect your site to Printful and start selling products, you need to set up WooCommerce. On the Dashboard home, you will have a Welcome to WooCommerce message with the Run the Setup Wizard button. Click it and get started!
On the Page Setup panel, WooCommerce will automatically set up:
- Shop page with your products
- Cart page where users can view their cart and begin the checkout
- Checkout page where users can pay for their items
- My Account page where users can see their past orders
The next step is the Store Locale panel. You will need to set the country your store is based in and what currency you deal with.
Afterward, you will go to the Shipping & Tax panel. Check that you will be shipping physical products here. If you are not sure of charging sales tax, don’t check it - you can change that later.
The last step of setting up WooCommerce is the Payments panel. Here, you choose the payment method for your store. You can choose Paypal, PayPal Standard, and Stripe (solution for credit cards).
Congratulations, you have set up your WooCommerce store!
Step 7: Connect Printful With Your Store
Now, you want to connect Printful with WooCommerce. Find WooCommerce on the WordPress Dashboard and go to the Settings page. Then, go to the Advanced tab and click on Legacy API. Enable the Legacy API, and don’t forget to save the changes!
It’s time to install the Printful Integration for WooCommerce plugin. Once you install it, go to the Printful tab on WordPress Dashboard and click the Connect button. Approve the connection with Printful when WooCommerce asks you, and follow the wizard to connect and confirm your account.
Then, on the Stores panel on Printful, you will get a message that your WooCommerce store is linked.
Step 8: Add Products To Your Store
Once you’ve connected Printful with your print-on-demand website, it’s time to add the designed products to your website.
Go to the Product Templates tab in Printful. Here, you can choose what items you want to put on your web store with the Add to store button. Keep in mind that you cannot add more than one item at a time, as each product must be approved.
Follow Printful’s wizard, where you can select sizes and colors, view mockups, and give the product a name and description.
The final step is pricing the item. Printful automatically suggests the price, and you can see how much you will profit from it. Feel free to play around with that or leave it as it is. Click submit to store, and the product will be live on your website.
Repeat this process for as many items as you want!
To see and edit Printful products, choose the Products > All Products from the WordPress Dashboard. These items will be shown on your shop page.

Step 9: Customize Your WordPress Theme
When you create your print-on-demand website, you want to personalize it around your branding. That’s where themes come in!
Themes allow you to customize how your POD shop looks like and how your products are displayed. There are thousands of free and paid themes available for customization.
To change a theme, go to Appearance > Themes on the WordPress Dashboard. There, you can find free and paid themes that can reflect the design you want.

These were the nine steps to create a functional print-on-demand website. We used WordPress and Printful as this combination provides the most flexibility when creating a branded print-on-demand store.
We wish you fun creating a new print-on-demand shop! Good luck!
About Us
We're M.i.A, a growing international print-on-demand service with a huge product range, including items you haven't even thought about.
- 150+ Product Range
- Global Locations
- Enterprise Support
- On-site Customisation
Check out our Youtube video here to see how simple print on demand is with our Shopify app!